ColdFusion 8 was an amazing release. The addition of the many image-related functions and cfImage tags certainly enhanced an already fantastic server-side language. They are fun to use, fun to write, and incredibly simple.
I wanted to have a quick play around with some front-end code to create a user-interface to dynamically crop an image using ColdFusion. Todd Sharp, Mr. Slidesix.com himself, developed a fantastic ColdFusion custom tag called cfImageCropper a few years ago to handle image cropping within CF. I've used this custom tag a few times in the past on various projects. If you haven't seen it or given it a test run, make sure you do.
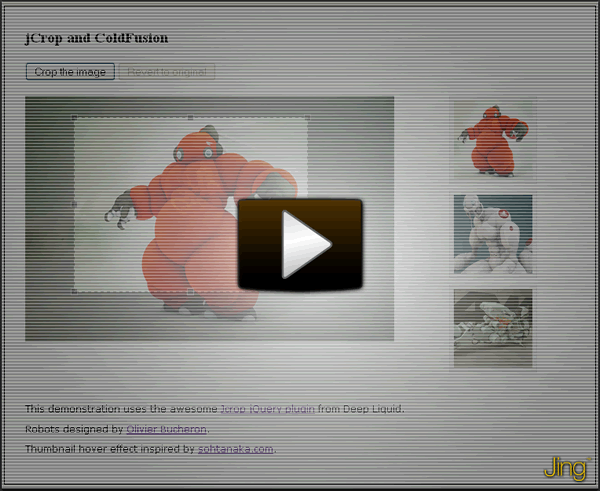
Instead of creating a custom tag, my small demonstration example uses jQuery and in particular a supersweet plugin called Jcrop to handle the core of the user-experince code and creating the crop marker. Here's a short video of the code in action (it will open in a new window):
The HTML
The HTML for the page and demonstration is fairly simple. The page contains a form which holds the required image-related values (X and Y positions, width and height, and the original image file name) which will be sent to the crop.cfm page to perform the image manipulation.
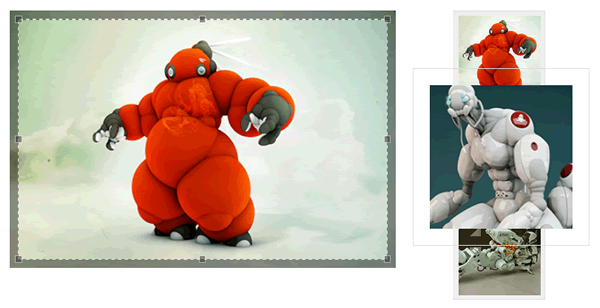
A thumbnail menu on the right hand side of the page contains the images available to load into the main view, from which you can perform the cropping.
<html>
<head>
	<title>coldfumonkeh : Jcrop and ColdFusion - image cropping</title>
	<script src="js/jquery.min.js"></script>
	<script src="js/jquery.Jcrop.js"></script>
	<link rel="stylesheet" href="css/jquery.Jcrop.css" type="text/css" />
	<link rel="stylesheet" href="css/style.css" type="text/css" />

	<!-- our script will go here -->
    <script language="Javascript">

    </script>

</head>
<body>
	<div id="outer">
	<div class="imageContainer">
	<h2>jCrop and ColdFusion</h2>
		<!-- The event handler from the JCrop plugin populates these
			values for us. Required to obtain the X Y coords and persist
			the image location for cropping and reverting the image. -->
		<form action="crop.cfm" method="post">
			<input type="hidden" size="4" id="x" name="x" />
			<input type="hidden" size="4" id="y" name="y" />
			<input type="hidden" size="4" id="x2" name="x2" />
			<input type="hidden" size="4" id="y2" name="y2" />
			<input type="hidden" size="4" id="w" name="w" />
			<input type="hidden" size="4" id="h" name="h" />

			<input type="hidden" name="imageFile"
					id="imageFile" value="" />
			<input type="button" name="imageCrop_btn"
					id="imageCrop_btn" value="Crop the image" />
			<input type="button" name="revert_btn"
					id="revert_btn" value="Revert to original" />
		</form>
		<!-- This is the image we're attaching Jcrop to -->
		<div id="croppedImage">
            <img src="images/ZamakRobots1.jpg" id="cropbox" />
        </div>
		<div id="thumbs">
			<ul class="thumb">

				<li><a href="images/ZamakRobots1.jpg">
				<img src="images/thumbs/ZamakRobots1.jpg" alt="Image 1" />
				</a></li>

				<li><a href="images/ZamakRobots2.jpg">
				<img src="images/thumbs/ZamakRobots2.jpg" alt="Image 2" />
				</a></li>

				<li><a href="images/ZamakRobots3.jpg">
				<img src="images/thumbs/ZamakRobots3.jpg" alt="Image 3" />
				</a></li>

			</ul>
		</div>
		<p>This demonstration uses the awesome
		<a href="http://deepliquid.com/content/Jcrop.html" title="Jcrop jQuery plugin"
			target="_blank">Jcrop jQuery plugin</a> from Deep Liquid.</p>
		<p>Robots designed by <a href="http://www.zamak.fr/"
			title="Oliver Bucheron at zamak.fr" target="_blank">
			Olivier Bucheron</a>.</p>
        <p>Thumbnail hover effect inspired by
            <a href="http://www.sohtanaka.com/web-design/fancy-thumbnail-hover-effect-w-jquery/"
            title="sohtanaka.com" target="_blank">sohtanaka.com</a>.</p>
	</div>
	</div>
</body>
</html>
One item to note here is the DIV element containing the main image, and more importantly the id attribute of the image within:
<!-- This is the image we're attaching Jcrop to -->
<div id="croppedImage">
	<img src="images/ZamakRobots1.jpg" id="cropbox" />
</div>
The Jcrop plugin needs to be invoked and applied to a particular element on the page to which it adds the crop functionality. It is this id attribute ('cropbox') that is used as that reference for the plugin. Without this, the Jcrop plugin will not be able to apply the crop marker to the image.
The script
Thanks to the awesome-ness of the open-source community and the wealth of plugins now available for use with the jQuery library, the core funtionality for the animation, placement and positioning of the cropping tool / marker is all handled by the Jcrop plugin. With a few lines of code to invoke the plugin and specify some default options, you can have the tool up and running in seconds.
Being the adventurous guy that I am, I obviously went a little further and added some extra variables and functions into the script body (leaving the plugin intact).
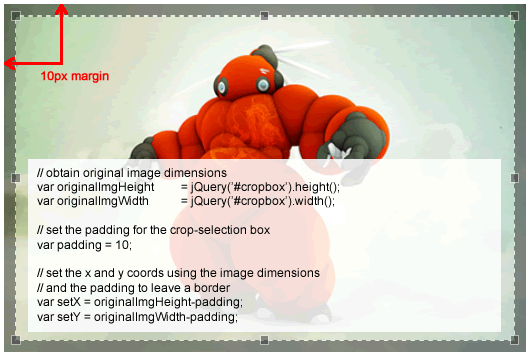
The plugin allows you to specify a specific position on the image to place the crop marker tool upon invocation, using the 'setSelect' parameter.
I wanted to obtain the image dimensions and work out the required X and Y positions for the marker, including an area of padding to provide some kind of visual border and to control the initial crop-position.

To do this, a static variable for 'padding' was set to 10px, and the X and Y coordinates were calculated by subtracting the padding value from the originalImgHeight and originalImgWidth variables respectively.
The main bulk of the javascript code is below.
jQuery(document).ready(function() {

// obtain original image dimensions
var originalImgHeight 	= jQuery('#cropbox').height();
var originalImgWidth 	= jQuery('#cropbox').width();

// set the padding for the crop-selection box
var padding = 10;

// set the x and y coords using the image dimensions
// and the padding to leave a border
var setX = originalImgHeight-padding;
var setY = originalImgWidth-padding;

// create variables for the form field elements
var imgX 		= jQuery('input[name=x]');
var imgY 		= jQuery('input[name=y]');
var imgHeight 	= jQuery('input[name=h]');
var imgWidth 	= jQuery('input[name=w]');
var imgLoc 	    = jQuery('input[name=imageFile]');

// get the current image source from the main view
var currentImage = jQuery("#croppedImage img").attr('src');

setImageFileValue(currentImage);

// set the imageFile form field value to match
// the new image source
function setImageFileValue(imageSource) {
    imgLoc.val(imageSource);
}

// instantiate the jcrop plugin
buildJCrop();

// add the jQuery invocation into a separate function,
// which we will need to call more than once
function buildJCrop() {
    jQuery('#cropbox').Jcrop({
        // set to zero to allow for non-constrained cropping
        aspectRatio: 0,
        // set the event handler function
        onChange: showCoords,
        onSelect: showCoords,
        // this param will add the crop area to the specified
        // point on the image on startup.
        setSelect: [padding,padding,setY,setX]
    });
    // enable the image crop button and
    // disable the revert button for usability.
    // After invocation, we only want to allow the user the ability
    // to crop the image.
    jQuery('#imageCrop_btn').removeAttr('disabled');
    jQuery('#revert_btn').attr('disabled', 'disabled');
}

// extra functions to go here


// end of jQuery(document).ready
});

// Our simple event handler, called from onChange and onSelect
// event handlers, as per the Jcrop invocation above.
// This function sets the values of the hidden form fields with
// the X Y coords and the dimensions of the crop mark area.
function showCoords(c) {
    jQuery('#x').val(c.x);
    jQuery('#y').val(c.y);
    jQuery('#x2').val(c.x2);
    jQuery('#y2').val(c.y2);
    jQuery('#w').val(c.w);
    jQuery('#h').val(c.h);
};
Ah, click it. Click it real good.
The following two functions are added within the main jQuery(document).ready method after the existing code, and both handle the onclick events for the two action buttons within the form - 'revert_btn' and 'imageCrop_btn'.
The crop button generates a string variable ('data') that concatenates the values from the hidden form fields containing the image crop marker information and generates the URL query string to send to the crop.cfm page, passing it into the jQuery.load() function. After the click, we disable the button and enable the image revert button to allow the user to restore the original file into view.
jQuery("#imageCrop_btn").click(function(){
    // organise data into a readable string
    var data = 'imgX=' + imgX.val() + '&imgY=' + imgY.val() +
        '&height=' + imgHeight.val() + '&width=' + imgWidth.val() +
        '&imgLoc=' + encodeURIComponent(imgLoc.val());
    jQuery('#croppedImage').load('crop.cfm',data);
    // disable the image crop button and
    // enable the revert button
    jQuery('#imageCrop_btn').attr('disabled', 'disabled');
    jQuery('#revert_btn').removeAttr('disabled');
    // do not submit the form using the default behaviour
    return false;
});
The revert button generates the HTML img tag, complete with the 'id="cropbox"' attribute. The Jcrop invocation uses this element ID to place the crop marker functionality onto the image. We obtain the src attribute of the image from the hidden imageFile form field using the name class selector.
// extra functions to go here

// selecting revert will create the img html tag complete with
// image source attribute, read from the imageFile form field
jQuery("#revert_btn").click(function() {
    var htmlImg = '<img src="' + jQuery('input[name=imageFile]').val()
        + '" id="cropbox" />';
    jQuery('#croppedImage').html(htmlImg);
    // instantiate the jcrop plugin
    buildJCrop();
});
As a reminder, within the buildJCrop function that invokes the plugin into existence and applies it to the active '#cropbox' element, we also set the default 'enabled' values for the two action buttons:
// enable the imageCrop_btn
jQuery('#imageCrop_btn').removeAttr('disabled');
// disable the revert_btn
jQuery('#revert_btn').attr('disabled', 'disabled');
This is to ensure that only the 'image crop' button is active and enabled when the image is ready to be cropped. There's no point having an active revert button if there's nothing to revert. :)
Enlarged thumbnail image
To add some extra functionality to the user experience, the thumbnail menu has some very clever (but relatively simple) jQuery code applied to create a unique hover effect to each thumbnail item.

This controls the z-index property of each image, and enlarges the thumbnail and alters the stack order when hovering over the image, which can be seen in the code below.
jQuery("ul.thumb li").hover(function() {
    // increase the z-index to ensure element stays on top
    jQuery(this).css({'z-index' : '10'});
    // add hover class and stop animation queue
    jQuery(this).find('img').addClass("hover").stop()
        .animate({
            // vertically align the image
            marginTop: '-110px',
            marginLeft: '-110px',
            top: '50%',
            left: '50%',
            // set width
            width: '174px',
            // set height
            height: '174px',
            padding: '20px'
        },
        // set hover animation speed
        200);
    } , function() {
        // set z-index back to zero
        jQuery(this).css({'z-index' : '0'});
        // remove the hover class and stop animation queue
        jQuery(this).find('img').removeClass("hover").stop()
            .animate({
                // reset alignment to default
                marginTop: '0',
                marginLeft: '0',
                top: '0',
                left: '0',
                // reset width
                width: '100px',
                // reset height
                height: '100px',
                padding: '5px'
            }, 400);
        });

        // onclick action for the thumbnails
        jQuery("ul.thumb li a").click(function() {

        // check to see if  id="cropbox" attribute exists
        // in the img html
        if (!jQuery("#croppedImage img").attr('id')) {
            // no attribute exists. add it in
            jQuery("#croppedImage img").attr('id', 'cropbox')
        }
        // instantiate the jcrop plugin
        buildJCrop();

        // Get the image name
        var mainImage = $(this).attr("href");
        jQuery("#croppedImage img").attr({ src: mainImage });

        setImageFileValue(mainImage);

        return false;
        });
});
Loading the thumbnail image
Each menu list item has an onclick function applied to the 'a' element which essentially finds the href attribute containing the path to the full-size version of the image, and adds that value to the src attribute of the img tag within the main view.
One thing to note here.. whenthe crop.cfm remote image is loaded in (using the writeToBrowser functionality offered by the cfimage tag) there is no id attribute applied to the HTML. The response from the dynamically generated image is similar to this:
<img alt="" src="/CFFileServlet/_cf_image/_cfimg-4883537409143135006.PNG"/>
If the user selects an item from the menu to load after cropping an existing image and before clicking the revert button, the id attribute needs to be set to 'cropbox', as we want to apply the Jcrop functionality to the newly loaded image. To do this, we have this small block of code within the above script block that checks for the existence of the id attribute in the img tag.
// check to see if  id="cropbox" attribute exists
// in the img html
if (!jQuery("#croppedImage img").attr('id')) {
// no attribute exists. add it in
    jQuery("#croppedImage img").attr('id', 'cropbox')
}
If it doesnt exist, it will be added with the required value before the img src attribute is updated with that of the new image.
Handling the crop
Lastly, but by no means least, the ColdFusion page that handles the cropping of the image. Incredibly simple in terms of code and function, the crop.cfm page simply uses the variables passed through to it via the URL scope from the calling page (the form variables sent via the jQuery.load() method).
The original image is read using the source attribute supplied in the query string, and a ColdFusion image object is created. It is then cropped to size using the ImageCrop() function, and the resulting cropped image then written out to the browser.
<cfsetting showdebugoutput="false">
<!--- hide debugoutput. You dont want to
	        return the debug information as well --->

<!--- set the params for the image dimensions --->
<cfparam name="url.imgX" 	type="numeric" 	default="0" />
<cfparam name="url.imgY" 	type="numeric" 	default="0" />
<cfparam name="url.width" 	type="numeric" 	default="0" />
<cfparam name="url.height" 	type="numeric" 	default="0" />
<cfparam name="url.imgLoc" 	type="string" 	default="" />

<cfif len(url.imgLoc)>

    <!--- read the image and create a ColdFusion image object --->
    <cfimage source="#url.imgLoc#" name="sourceImage" />

    <!--- crop the image using the supplied coords
              from the url request --->
    <cfset ImageCrop(sourceImage,
                        url.imgX,
                        url.imgY,
                        url.width,
                        url.height) />

    <!--- write the revised/cropped image to the browser
                    to display on the calling page --->
    <cfimage source="#sourceImage#"
                action="writeToBrowser" />

</cfif>
With the exception of creating the cfparam tags and the cfif block, the main code here that is actually required to crop and generate an image on the fly is three lines of code (a little more if you space them as I have done for readability, but, you know...).
I ran a test a few years ago when ColdFusion 8 was first released. Given that ColdFusion can create a CAPTCHA image in one line of code, I wanted to see how it compared writing the same CAPTCHA image in PHP. Needless to say, my code block had gone well over the one line CF needed to get the same job done.
True, there is a heck of a lot of core work going on under the hood that actually produces the results we want from the simple tags we supply, and that is a testament to Allaire, Macromedia and Adobe for creating and evolving a superb server-side language that is incredibly powerful and easy to use, but the fact still remains.. you can do more in ColdFusion in less time.
And that HAS to be a good thing, right? Right?! Yeah it is.
Fin (the end)
That's about it really. Working on this small demo project has been great fun. I must admit it's been a few months since I've got my hands dirty with jQuery, but getting back into it was great fun. Obviously one major factor to take away from this example is the fact that ColdFusion makes cropping images incredibly easy - as it does with basically everything else you can throw at it. :)
The source code is available here, so please feel free to download and have a play around with it yourselves.


