In the first of a series of small tutorials, we will discover the new features available in ColdFusion 9 that expose the service layer for use with external languages and applications.
Andy Allan from Fuzzy Orange and I co-authored a tutorial in November's issue of .net magazine highlighting the use of ColdFusion as a Service. We followed up the article with presentations over the two week Scotch on the Rocks European Tour in October. The feaure went down very well and sparked some interest in an other-wise as-of-yet unknown addition to ColdFusion 9.
Common but still powerful tags such as CFImage and CFChart were once only available for use directly in a ColdFusion .cfm template page. Thanks to ColdFusion 9 the services are available for RIA developers to call as remote web services, either in the form of WSDL CFCs or as Actionscript Proxy Classes when writing FLEX/AIR applications.
Exposed Services
The services that are exposed are:
- Chart
- Document
- Image
- Pop
The above tags are available for use in Flex/Flash/AIR applications using the cfservices.swc file included in every ColdFusion 9 installation. However, the SWC file itself acts as a 'placeholder', or an easy method of accessing the classes on the web server, which are ultimately exposed as web services. As such, they are also available through SOAP and AMF, meaning developers in other languages (.net, php, ruby etc) can also access and utilise the awesome power that ColdFusion has to offer.
The WSDL web services are typically located in the following location on your server:
http://[server]:[port]/CFIDE/services/
As an example, if you wished to access the Mail service from your built-in local development server, the URL would be the following:
http://localhost:8500/CFIDE/services/mail.cfc?wsdl
The application we will build
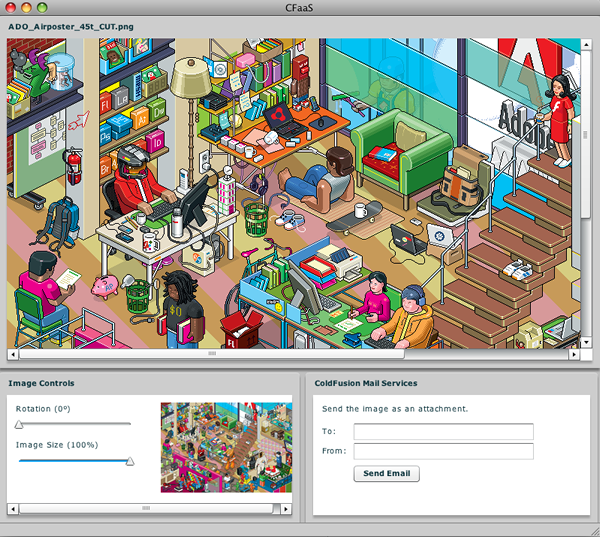
In this tutorial, we will explore and investigate the ease of using the ColdFusion services in a FLEX/AIR application, and will do so by creating a fairly simple yet powerful desktop application that will accept an image via drag/drop.
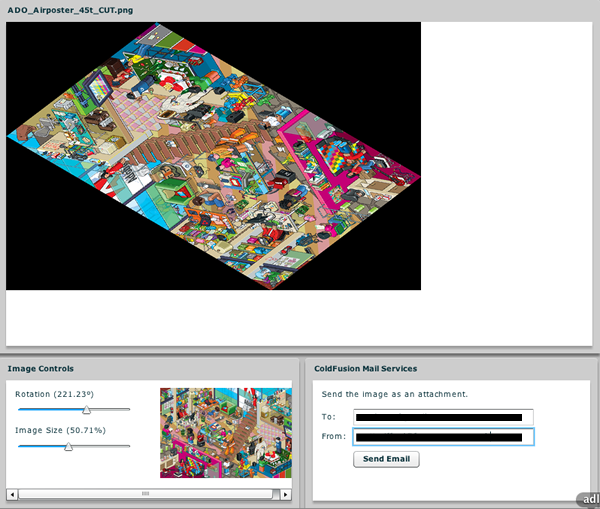
The user will be able to resize and rotate the image (using the Image class) and finally the user can send an email from the desktop application with the image as an attachment (using the Mail class). We will end up with an application looking like this:
Minor language differences
<cfmail
	to="[email protected]"
	from="[email protected]"
	subject="Artist request - Kenny Loggins">

</cfmail>
The above is a traditional cfmail tag that all ColdFusion developers know and love with the bare essential attributes. Consider this against the cf:Mail tag below (which is an example of the proxy classes available to us when using the CF services in FLEX):
<cf:mail
	to="[email protected]"
	from="[email protected]"
	subject="Artist request - Kenny Loggins">

</cf:mail>
The only difference in this example is the tag naming convention, where we instantiate the tags using the 'cf:' namespace, which we declare in the MXML code when writing our application.
FLEX and ColdFusion have always worked so beautifully with each other, and thanks to ColdFusion 9 the transition or crossover for CF developers to play with FLEX apps has been made even easier.
Setting User Access
Due to the fact that the service layer exposes the WSDL CFCs, access is restricted by default. We need to set a specific user account with the correct permissions to access the services, and we do this under the SECURITY menu in the ColdFusion Administrator (http://localhost:8500/CFIDE/administrator/), and proceed to the 'User Manager' option.
Add a new user, and set the user name and password for the account:
At the bottom of this settings page, you can select which of the exposed services you wish to allocate to that user account. I've been very greedy and allowed access to all of them for my account, but following this tutorial you will certainly need the Image and Mail service.
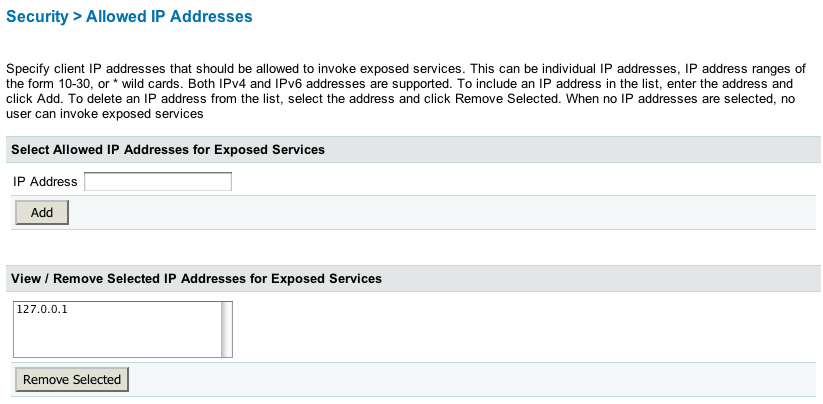
To enable access for the services, you'll also need to supply an IP address or range of IP addresses that can use the exposed layer, under the 'Allowed IP Addresses' menu option. As we are developing on the localhost, you can add 127.0.0.1 to the list.
Getting started with Services in Flex/AIR
There are three simple steps to follow to build a dynamic FLEX/AIR application that will use the ColdFusion services:
- Import the cfservices.swc library
- Add the ColdFusion namespace
- Write some code
Import the cfservices.swc library
Let's create a new FLEX / AIR project in Eclipse/Flash builder.
Enter the name for the project (it can be anything your heart desires, although something slightly relevant to the working application is a good move ;) )
Although we are going to be accessing services on a ColdFusion server, we do not need to specify any server type in the drop down box on the project configuration page. This will be handled by the SWC file and adding the namespace.
Hitting 'next', accept the default debug output options for the project, and proceed to the third screen in the wizard, the source and library build paths. Selecting the 'Library Path', we need to browse to and import the cfservices.swc file into the application. Hit the 'Add SWC' button to open the browse dialog.
Browse to the location of the cfservices.swc file on your ColdFusion installation.
This is typically in: /CFIDE/scripts/AIR/
Click 'OK', and the cfservices.swc file will be added to the library build path for your application.
Add the ColdFusion namespace
Now that the project has been created and the cfservices.swc file has been added to the library build path, we can start accessing the ColdFusion services.
We need to add a new namespace to the FLEX application that points to the ColdFusion services, so add this line of code as an attribute inside the opening tag:
xmlns:cf="coldfusion.service.mxml.*"
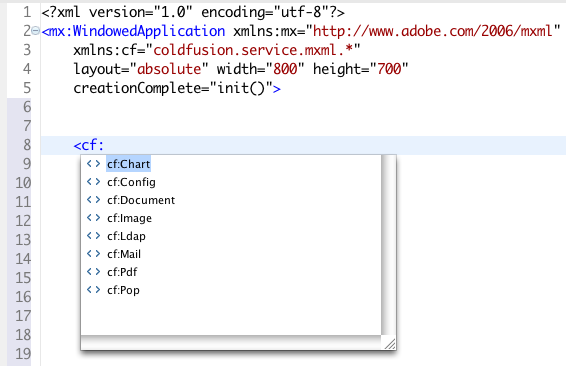
I have also added the width and height for the application, and the init() method to be run on creationComplete. The init() method will be written a little further along in the tutorial. Now that the cf namespace has been added to the application, by typing 'cf:' at any point in the mxml page, you will see the code hinting window will pop up with the new ColdFusion exposed services.
Adding the ColdFusion server The library has been added, the namespace has been declared and the cf:tags are now available for use. At this point, we have no interaction with any ColdFusion 9 server, so we need to declare the settings for the application to interact with the server and use it's exposed services.
This is easily achieved by using the cf:Config tag. The Config class sets the configuration parameters and connection details for the ColdFusion services, and should be used before setting up any other service class. The params set here are global, and can be overridden by any of the individual service proxy classes should you need to.
<!-- ColdFusion Service settings and calls -->
<cf:config
	id="conf"
	cfserver="localhost"
	cfport="8500"
	serviceusername="mgifford"
	servicepassword="mgifford" />
In the above code block, I am defining the connection details for my local ColdFusion 9 development server, which uses the built-in web server. Set the server name (the server name or iP address), the port on which the ColdFusion server is running and the service username and password, which is set in the ColdFusion Administrator.
File uploads using the Util class
The first step of user-interaction with this application is to drag and drop an image onto the image panel.
The init() method is run on creationComplete of the AIR application, and sets up the initial variables and handlers. We are accepting gif, jpg or png image formats, as defined in the imgArray variable below. The event listeners for the drag and drop have been added to the imagePanel component in the mxml code.
The important code to note here is the creation of the variables handling the file upload. We are using the details set in the cf:Conf tag to call the variables into the Actionscript (conf.serviceUsername etc)
// constructor method
// add event listeners to the panel for interaction, define the array of 'permitted' images,
// and set up the ColdFusion web access for uploads
private function init():void {
	imagePanel.addEventListener(NativeDragEvent.NATIVE_DRAG_ENTER, onDragEnter);
	imagePanel.addEventListener(NativeDragEvent.NATIVE_DRAG_DROP, onDragDrop);
	imgArray = new Array('gif','jpg','png');

	var variables:URLVariables = new URLVariables();
	variables.serviceusername  = conf.serviceUserName;
	variables.servicepassword  = conf.servicePassword;

	uploadUrl.url		   = "http://" + conf.cfServer + ":" + conf.cfPort + "" + Util.UPLOAD_URL;
	uploadUrl.method 	   = "POST";
	uploadUrl.contentType   = "multipart/form-data";
	uploadUrl.data		   = variables;

	controlPanel.enabled	   = false;
	mailPanel.enabled	   = false;
}
The uploadUrl.url variable also uses the settings written in the cf:Config tag, and the UPLOAD_URL variable is a constant from the Util class that contains the url on the ColdFusion server of the Upload service, relative to the CF webroot, which generates the following location:
http://localhost:8500/CFIDE/services/upload.cfc?METHOD=uploadForm
We are also sending through the conf.serviceUserName and conf.servicePassword variables in the uploadUrl.data. As the WSDL services are behind the CFIDE on the ColdFusion server, we need to send these through to authenticate and access the CFCs.
Below is the onDragDrop() method which runs after the file extension has been accepted by the application:
// on drop, set the image source, apply the image title to the panel, and upload the file for use
// with the ColdFusion services
private function onDragDrop(e:NativeDragEvent):void {
	var fa:Object 		= e.clipboard.getData(ClipboardFormats.FILE_LIST_FORMAT);
	// set the title of the panel with the file name of the image
	imagePanel.title 	= fa[0].name;

	// start the file upload to the ColdFusion server
	file = FileReference(fa[0]);
	file.addEventListener(DataEvent.UPLOAD_COMPLETE_DATA, onUploadComplete);
	file.addEventListener(IOErrorEvent.IO_ERROR, onIOError);
	file.upload(uploadUrl);
}
To note in the above code block, the accepted drag image is stored in the fa Object variable, which is then cast to a File reference. The file then uploads the accepted drag image to the ColdFusion Upload class, and runs the onUploadComplete() method after a successful transaction:
// run after initial drag/drop to obtain the file and run the ColdFusion image info service
private function onUploadComplete(event:DataEvent):void {
	uploadedFileUrl = Util.extractURLFromUploadResponse(event.data.toString());
	dragImage.source = uploadedFileUrl;
	getImageInfo.execute();
}
The onUploadComplete() method handles the return from the ColdFusion server. Here, we use the Util class again with the extractURLFromUploadResponse() method.
This takes the response returned from the Upload service and extracts the path of the uploaded file on the ColdFusion server. The url returned from the server and obtained from the method will be similar to the following:
http://localhost:8500/CFFileServlet/_cfservicelayer/_cf6722484872514459847.png
Transmitting files to your CF server and getting the exact string back to you has never been easier, all thanks to the power of the exposed services in ColdFusion 9.
The final line of the above code block runs the first of the <cf:Image /> tags with the id getImageInfo. The CF proxy classes are run using the execute() method, and the image tag in question is shown below:
<cf:image
	id="getImageInfo"
	action="info"
	source="{dragImage.source}"
	result="imageInfoResult(event)"
	fault="onFault(event)">

</cf:image>
Again, you can see that with the exception of the required result and fault handler methods, the service tags available for use in the FLEX application are identical to the matching tags available when coding directly into a ColdFusion .cfm page.
Streamlining the image tags
This application has four <cf:Image /> tags in use, each of which run a separate function and have individual result and fault handlers.
The Image service allows for batch processing, which gives the developer the ability to send through an associative array of information to the class to run and manipulate the image, like so:
Actionscript:
[Bindable] public var arrAttributes:Array =
    [{Resize:{width:"75%",height:"75%"}},
    {Flip:{transpose:"270"}}]
MXML:
<cf:image
	id="batchImage"
	action="batchoperation"
	source="{path to image source}"
	attributes="{arrAttributes}">

</cf:image>
The ability to batch process image amendments, sending multiple parameters through to the service in one action is a fantastic way to help streamline the code and get the most out of the awesome CF9 image functions on the server.
We will cover the batch processing in more detail in a later tutorial.
Sending Mail
An incredibly exciting function now available to us for use in the FLEX application is the ability to send email using the ColdFusion server.
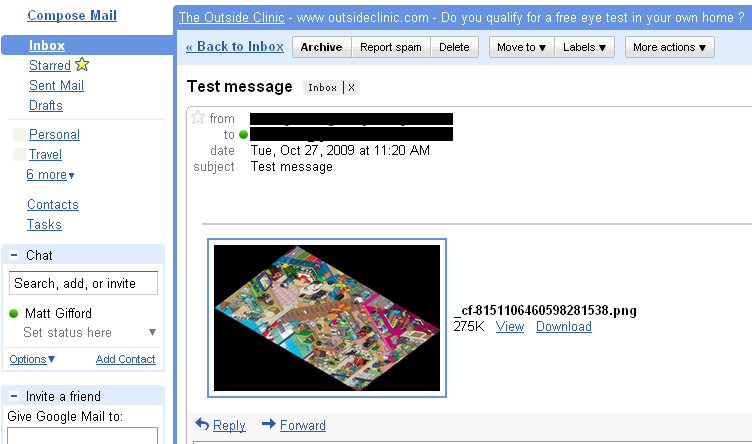
In our demo application, we allow the user the ability to send an email with the amended image as an attachment. The cf:Mail tag is fairly self-explanatory, containing the standard attributes required for the mail tag to run, with the addition of the result and fault handlers to control the success or failure events.
MXML Mail Tag:
<cf:mail
	id="sendMail"
	to="{mailTo.text}"
	from="{mailFrom.text}"
	subject="Test message"
	result="mailSuccess(event)"
	fault="mailFailure(event)">

</cf:mail>
The image attachment is handled in the Actionscript file within the sendEmail() method which is run after clicking the 'Send Email' button.
The image is added to an array called 'attachCollection', which in turn is added to the email attachments attribute. The above sendMail mail tag is run using the execute() method.
Actionscript:
private function sendEmail():void {
        attachCollection[0] = {"file": dragImage.source};
        sendMail.attachments = attachCollection;
        sendMail.execute();
}
Final Notes
I hope that this tutorial/explanation of using ColdFusion as a Service in your FLEX/AIR applications has been an eye-opener if nothing else. I was truly excited by this feature when I had read about it in the documentation during the CF9 BETA testing.
I personally believe it has opened the doors for increased RIA development, and the ability to utilise the CF features on other development languages goes to highlight the strength and power that ColdFusion possesses as a server language.
Hopefully other developers will realise the benefits of using ColdFusion too.
Complete code
The complete code has been supplied in the attached ZIP file below as an exported Flex Builder project (the main MXML file and the script.as file) to replicate the demo application.


